
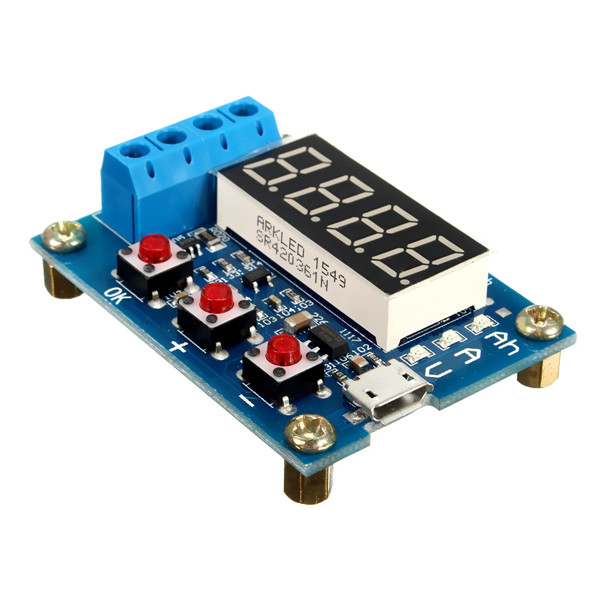
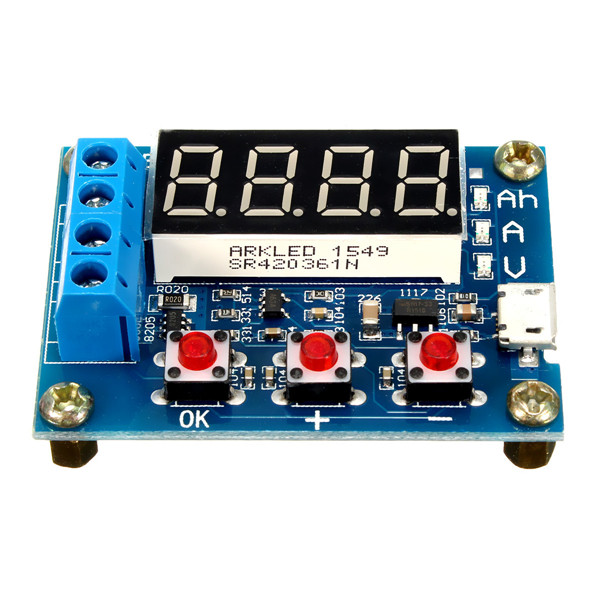
อุปกรณ์ทดสอบความจุถ่านลิเธียม ZB2L3 Lithium Battery Capacity Tester External Load Discharge Module

| รหัสสินค้า | D81 |
| หมวดหมู่ | ถ่าน 18650 / แบตเตอรี่ / เครื่องชาร์ท |
| ราคา | 65.00 บาท |
| สถานะสินค้า | พร้อมส่ง |
| ลงสินค้า | 24 มิ.ย. 2563 |
| อัพเดทล่าสุด | 13 ต.ค. 2568 |
| คงเหลือ | 7 ชิ้น |
| จำนวน | ชิ้น |
หยิบลงตะกร้า

Tags : อุปกรณ์ทดสอบความจุถ่านลิเธียม ZB2L3 Lithium Battery Capacity Tester External Load Discharge Module, ZB2L3
รายละเอียดสินค้า
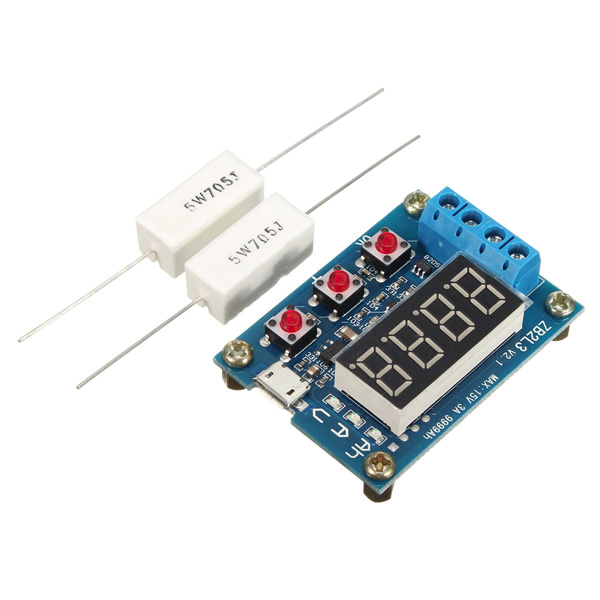
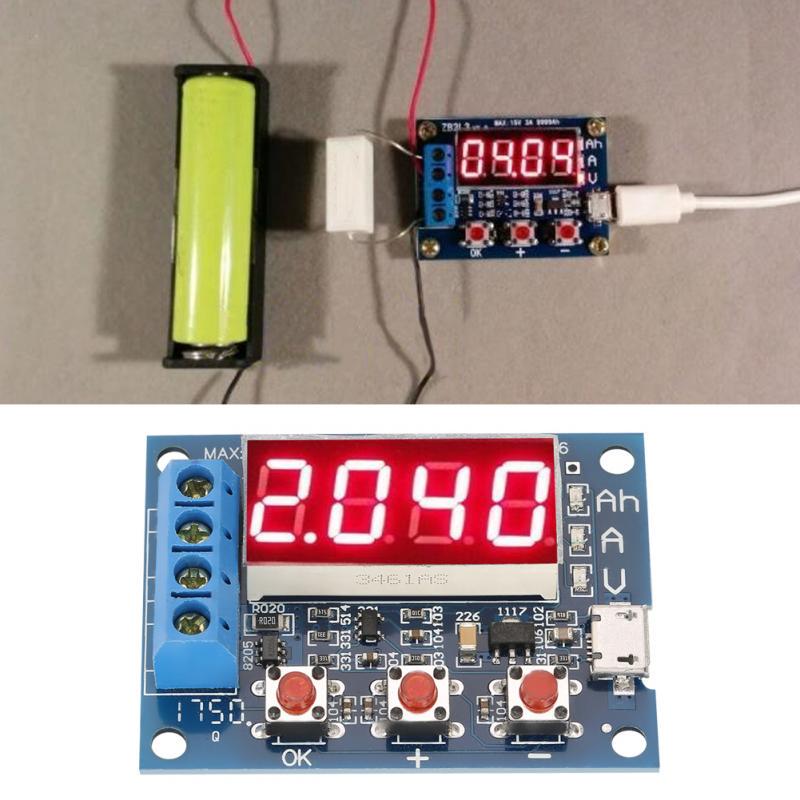
อุปกรณ์ทดสอบความจุถ่านลิเธียม ZB2L3 Lithium Battery Capacity Tester External Load Discharge Module
Note:
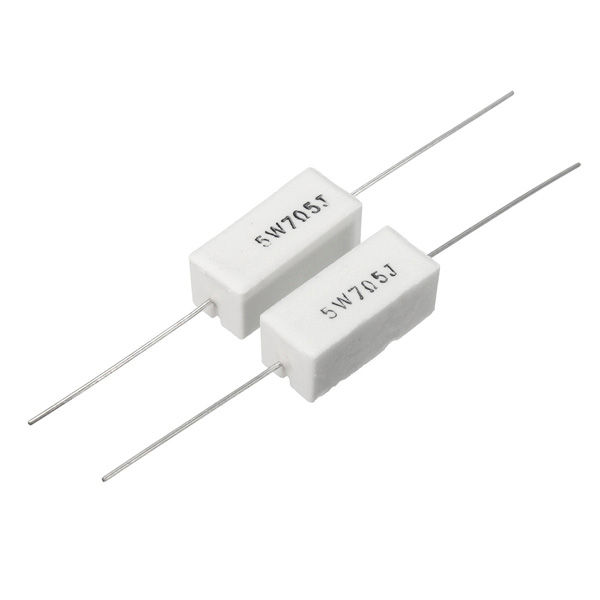
Using the resistance of the discharge process, resistive load will seriously heat, please pay attention to safety!
Please install the 50W aluminum resistance (has been soldered half part of high temperature line) to a metal plate to use!
This circuit voltage in order to improve the measurement accuracy, specially designed DC bias, when the terminal connects nothing will display a small voltage, but does not affect the actual measurement, if you are shorting the input terminal (absolute 0V) will display 0. If you want to know the principle, you can check the superposition theorem of electrical engineering.
Specification:
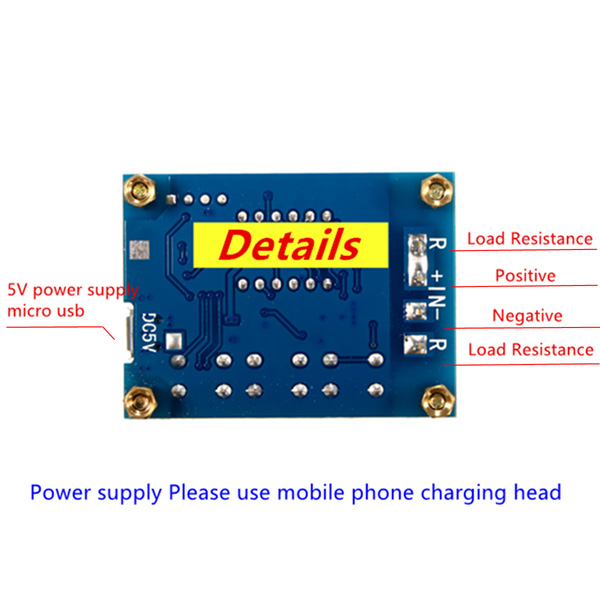
- Power supply voltage: DC4.5-6V (micro USB connector)
- Operating current: Less than 70mA
- Discharge voltage: 1.00V-15.00V, 0.01V resolution
- Termination voltage range: 0.5-11.0V
- Supported current: Maximum 3.000A, 0.001A resolution
- Maximum voltage measurement error: 1% + 0.02V
- Maximum current measurement error: 1.5% ± 0.008A
- Maximum battery capacity range: 9999Ah (1Ah = 1000mAh) greater value is switched by shifting the decimal point, when it is less than 10Ah will display X.XXX, up to 10Ah or more will display XX.XX, and so on.
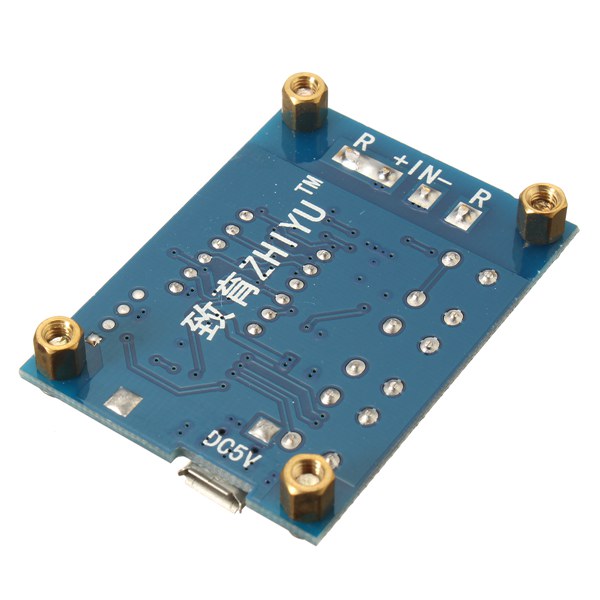
- Board size: 50 x 37mm
- Finished size: 50 x 37 x 17mm (L x W x H maximum position size, contains copper foot height)
- Board net weight: 28g (including pillars)
- Resistor weight: about 27g (including cable)
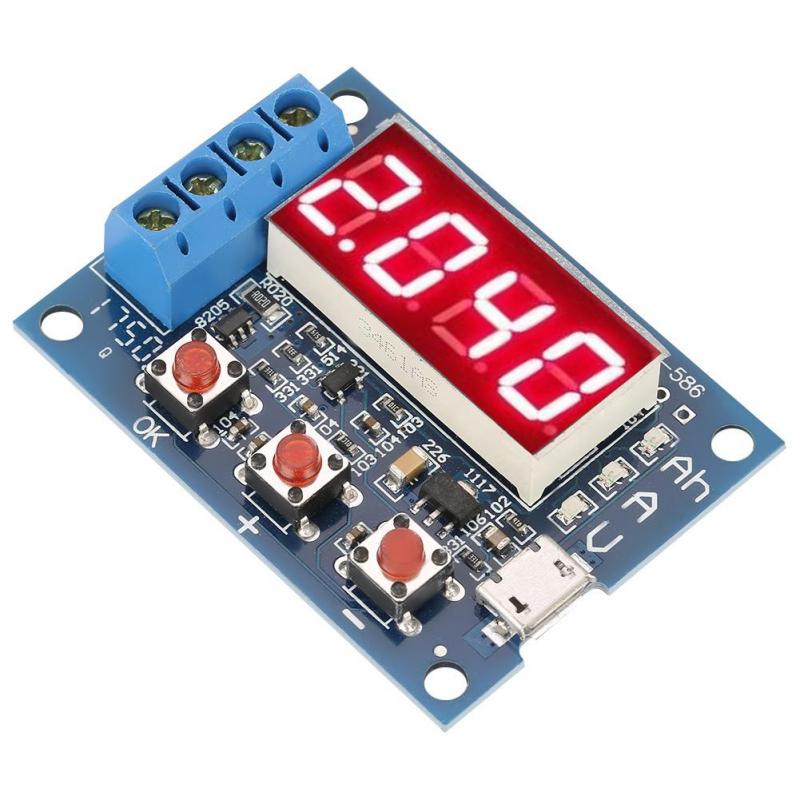
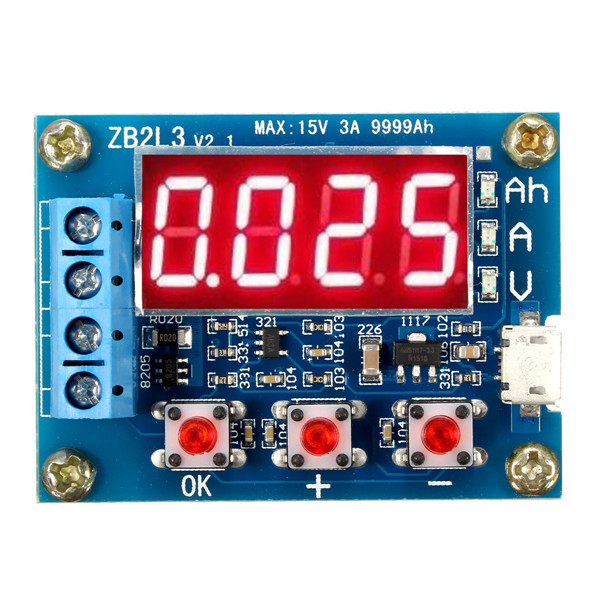
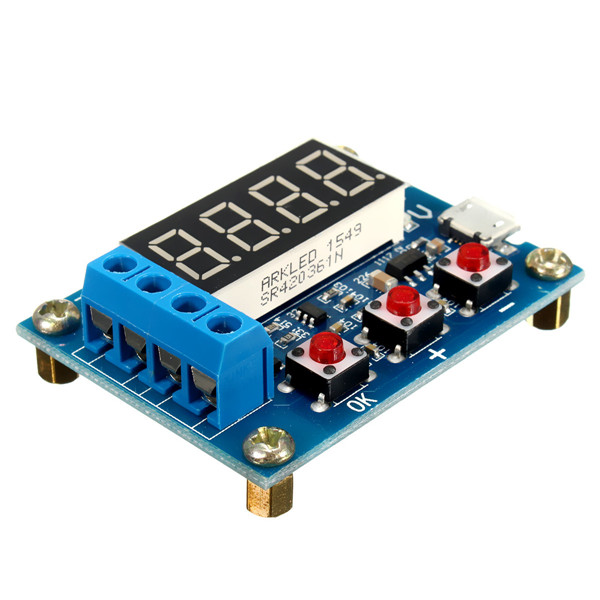
How to use:
- 1. The test battery should be fully charged.
- 2. Connect the battery positive to positive input, negative input to the negative, can not be reversed (with load reversal may damage the circuit)! Load connected to the positive output and negative output, power on the tester with micro USB power supply (not available desktop or laptop USB powered), then the battery voltage display.
- 3. Direct start test only need to press the "OK" button, the tester can automatically make an appropriate termination voltage according to the battery full charge voltage, and will start flashing three times to enter the test. If you need to manual set termination voltage, only need to pressing "+" or "-" buttons to modify under battery voltage display state, the termination voltage display beginning with P, behinds means voltage vaule, voltage resolution 0.1V, after setting up pressing the "OK " button to start testing.
- 4. After the start of the test, the tester will turn on the control load of the electronic switch, the test data will rotation display between release capacity (Ah), current discharge current (A) and battery voltage (V). When the battery voltage reaches the setting termination voltage, load control switches off the tester, data stays in capacity (Ah) and the corresponding indicator flashes quickly together, at this time the display is the actual capacity of the discharge capacity of the battery, press "OK" button to stop flashing allows stable data display, press again "OK" button to return to the power-on state, now you can replace the battery to test the next section.
Error codes and their meanings:
- Err1: Battery voltage is above 15V
- Err2: Battery voltage is lower than the termination voltage
- Err3: Battery can not afford to load discharge current or the circuit resistance is too high
- Err4: Overcurrent (current exceeds 3.1A)
Secondary calibration operation:
Press and hold the three buttons at the same time to power on the tester, enter the calibration mode, first display the number of calibration records and then enter the official calibration sampling program display 0u0A, then short-circuit the input positive and negative, then press the "OK" button to complete the display J10u, Apply 10.00V standard DC voltage between the input positive and negative poles, then press the "OK" button, then display J2.0A, apply 2.0A constant DC current to the output negative pole (inflow direction) and negative input pole (outflow direction) and press Move the "OK" button to complete the calibration. The tester pre-audits the calibration data. If the calibration data is reliable, it will display 4 calibration numbers and then exit. If the pre-audit considers the data to be unreliable, the data will be discarded.
วิธีการชำระเงิน
-
ชำระเงินค่าสินค้าโดยการโอนเงินเข้าบัญชีด้านล่าง โดยลูกค้าสามารถโอนเงินหลังทำรายการสั่งซื้อได้ทันทีไม่ต้องรอยืนยัน
-
หลังจากโอนเงินแล้วสามารถแจ้งชำระเงินได้ที่ เมนูแจ้งชำระเงิน
หรือชำระเงินผ่าน PayPal โดยคลิกที่ ชำระเงินออนไลน์
ชำระเงินผ่านธนาคาร
ชำระเงินด้วยการ Scan QR


ดิศรณ์ ตันติเกตุ
098-xxxxxx-2
Accept All Banks | รับเงินได้จากทุกธนาคาร
ชำระเงินออนไลน์
- ค่าธรรมเนียม 3.9% + 11 THB
- การชำระผ่าน PayPal คุณไม่จำเป็นต้องแจ้งชำระเงิน เนื่องจากระบบจะจัดการให้คุณทันที ที่คุณชำระเงินเสร็จสมบูรณ์


- พิมพ์ “GenLogic” ในช่อง Search
- หรือเข้าจากรายการร้านค้าโปรดของฉัน
เข้าร่วมร้านค้า Arduino4
ร้านGenLogic
/www.genlogic.co.th/
สมัครสมาชิกร้านนี้ เพื่อรับสิทธิพิเศษ

▲
▼
รายการสั่งซื้อของฉัน
รายการสั่งซื้อของฉัน
ข้อมูลร้านค้านี้

GenLogic
ขายบอร์ด Arduino และอุปกรณ์อื่นๆ ที่ใช้ร่วมกับ Arduino รวมถึง Microcontroller, Module, Breakout board, Sensor และอุปกรณ์อิเล็กทรอนิกส์ต่างๆ ในราคาถูก เหมาะสำหรับผู้ที่สนใจเกี่ยวกับ Arduino และการโปรแกรมระบบ Microcontroller และอิเล็กทรอนิกส์ทั่วไป และทำโปรเจคต่างๆ ร้านมีสินค้าสต็อกพร้อมจัดส่ง จัดส่งสินค้ารวดเร็วภายใน 1-2 วันทำการเท่านั้น
เบอร์โทร :
อีเมล : sale@genlogic.co.th
อีเมล : sale@genlogic.co.th
ส่งข้อความติดต่อร้าน
เกี่ยวกับร้านค้านี้
ค้นหาสินค้าในร้านนี้
ค้นหาสินค้า
สินค้าที่ดูล่าสุด
บันทึกเป็นร้านโปรด
Join เป็นสมาชิกร้าน
แชร์หน้านี้
แชร์หน้านี้
↑
TOP เลื่อนขึ้นบนสุด
TOP เลื่อนขึ้นบนสุด
สินค้าในตะกร้า ({{total_num}} รายการ)

ขออภัย ขณะนี้ยังไม่มีสินค้าในตะกร้า
ราคาสินค้าทั้งหมด
฿ {{price_format(total_price)}}
- ฿ {{price_format(discount.price)}}
ราคาสินค้าทั้งหมด
{{total_quantity}} ชิ้น
฿ {{price_format(after_product_price)}}
ราคาไม่รวมค่าจัดส่ง
➜ เลือกซื้อสินค้าเพิ่ม